Google OAuth Authentication
What is Google OAuth?
Google OAuth (Open Authorization) is a secure and widely-used authentication protocol that allows users to log in to your application using their Google credentials. Instead of creating a new account, users can simply authorize your application to access their Google information, providing a seamless and trusted login experience.
Enabling Google OAuth Authentication in Full-Stack-Kit
To allow users to authenticate to the app using Google OAuth, follow these steps in Full-Stack-Kit:
-
Open the
/app/app.config.tsfile. -
Enable the
auth.providers.googleprovider and provide the required configuration:auth: { providers: { google: { enabled: true, clientId: String(process.env.GOOGLE_CLIENT_ID), clientSecret: String(process.env.GOOGLE_CLIENT_SECRET), }, }, // ... other configuration options },
As you can see, you need to provide the clientId and clientSecret to be able to use Google OAuth.
You can obtain these credentials by creating a new project in the Google Cloud Console (opens in a new tab).
Setting up Google OAuth 2.0
To use OAuth 2.0 in your application, you need an OAuth 2.0 client ID, which your application uses when requesting an OAuth 2.0 access token.
To create an OAuth 2.0 client ID in the Google Cloud Console (opens in a new tab):
-
Go to the Google Cloud Platform Console.
-
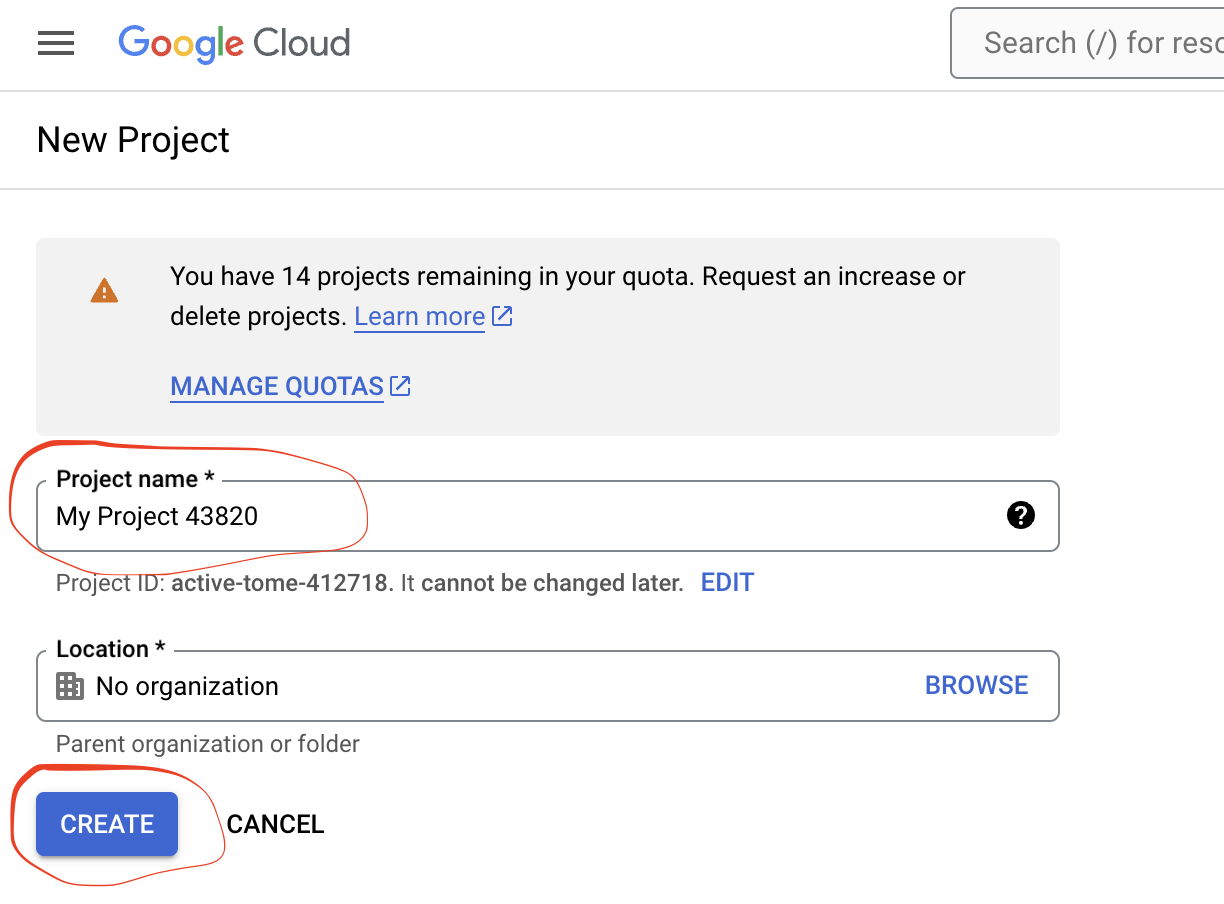
From the projects list, select a project or create a new one.
- Give the project a name and click "Create".
-
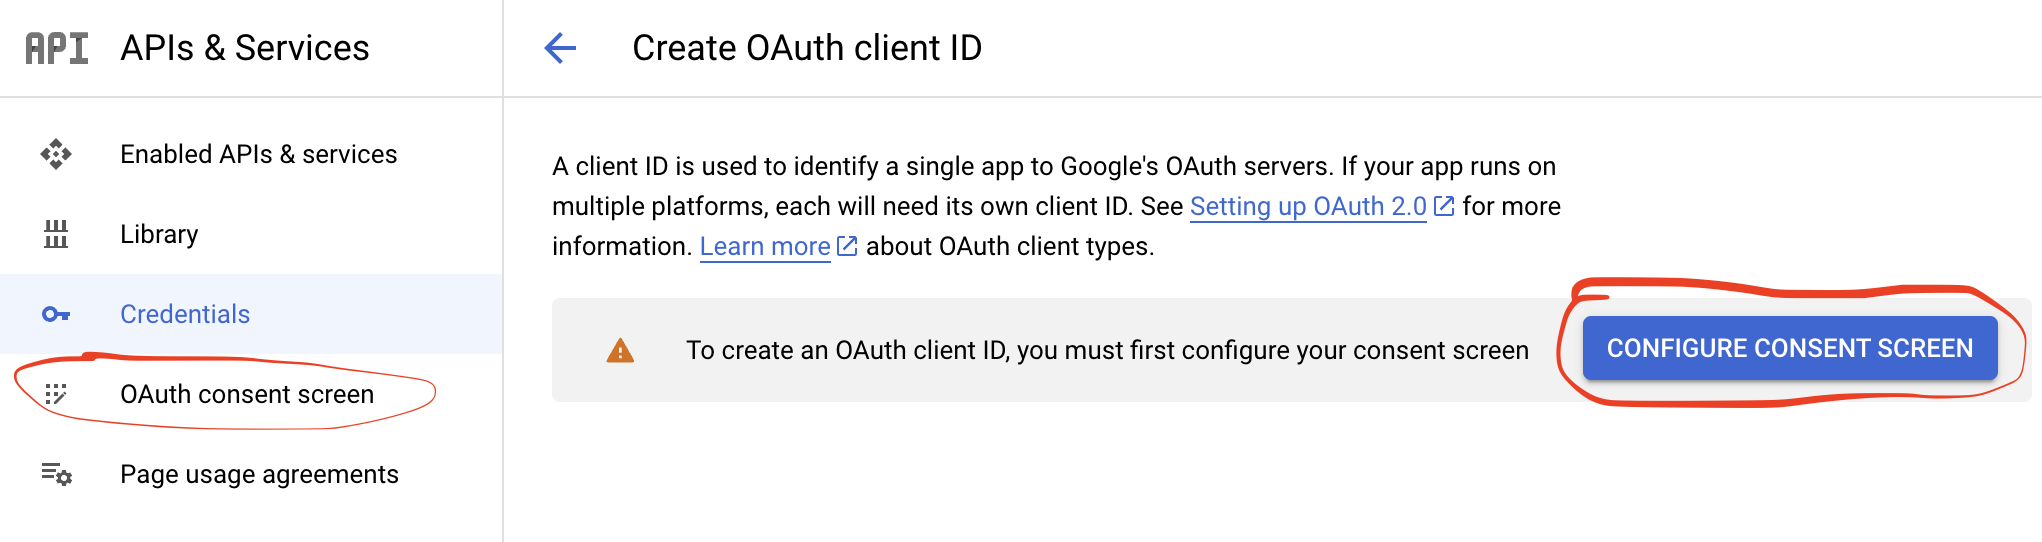
On the left, click "OAuth Consent Screen".
-
Configure the required Consent Screen info as follow:
-
Select "External" and click "Create".
-
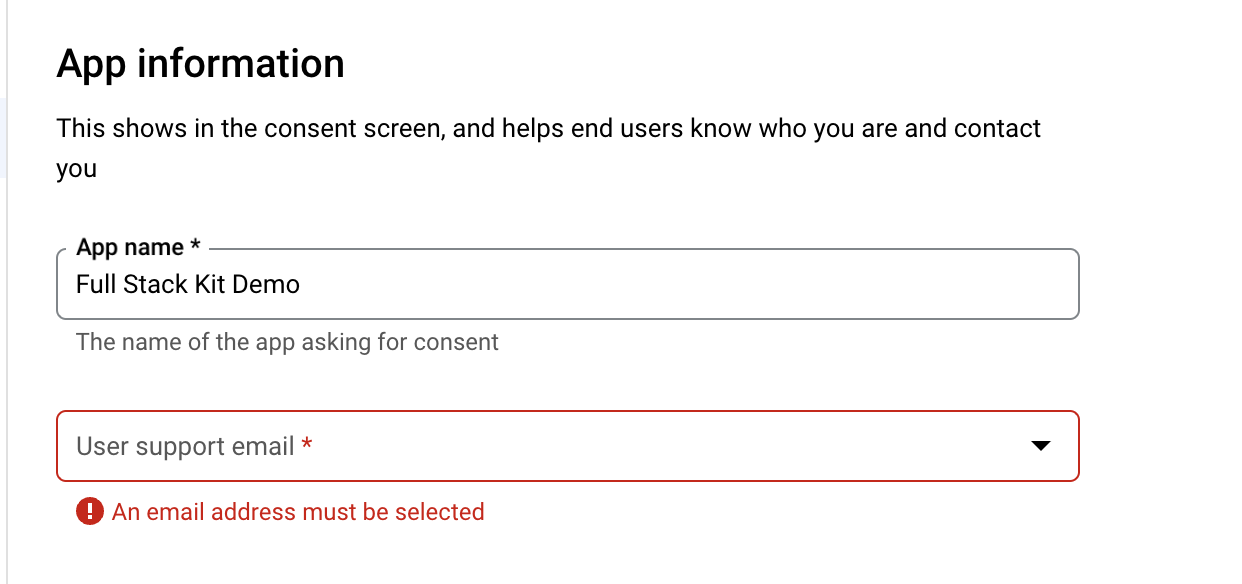
Fill the App name and User support email fields
-
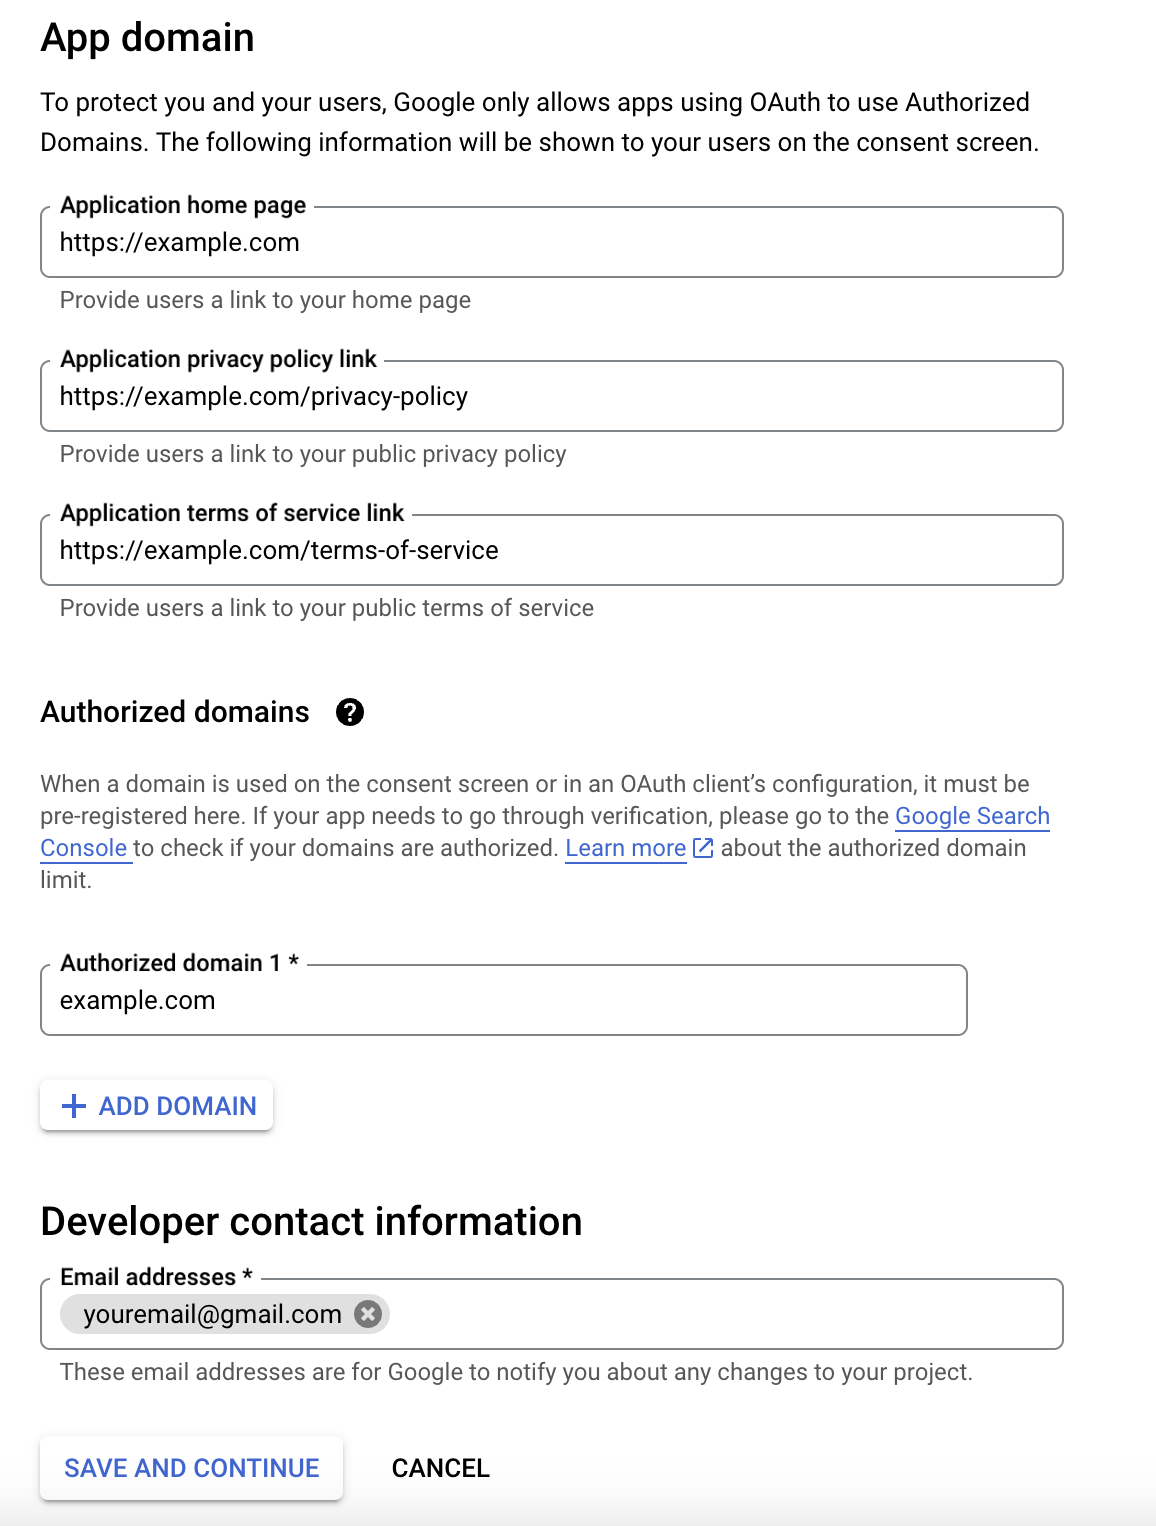
Fill the App domain and Developer contact sections and click "Save and Continue". (Ignore the app logo for now, you will be able to add it later when you are ready to publish your app)
ℹ️Note: These values are only examples. You should fill the fields with your own information. Put your app name in the "App name" field, and your email in the "User support email" field. Replace
example.comwith your domain name or the domain name you'll be purchasing for your app if you don't have a domain yet. You can always change these values later.-
On the Scopes screen, click "Add or remove scopes", select the UserInfo.profile and UserInfo.email scopes, at the bottom of the drawe click "Update", and click Save and Continue.
-
On the Test users screen, click "Add users" and add your email address as a test user, then click "Save and Continue".
-
On the Summary screen, click "Back to Dashboard".
-
-
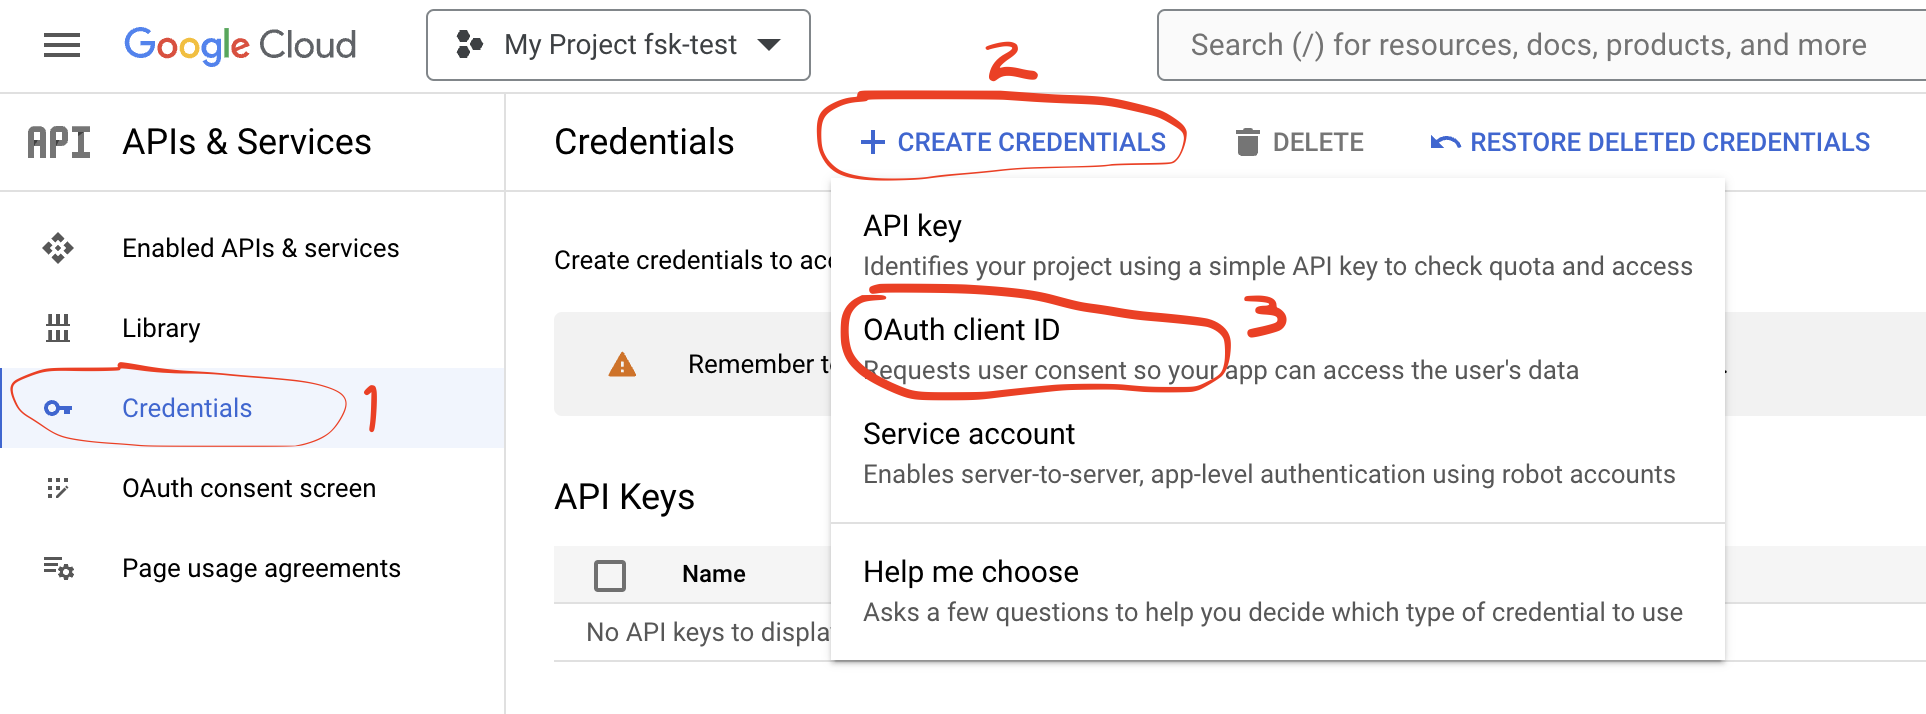
On the left, click Credentials, Then Create credentials, then select the "OAuth client ID" option.
-
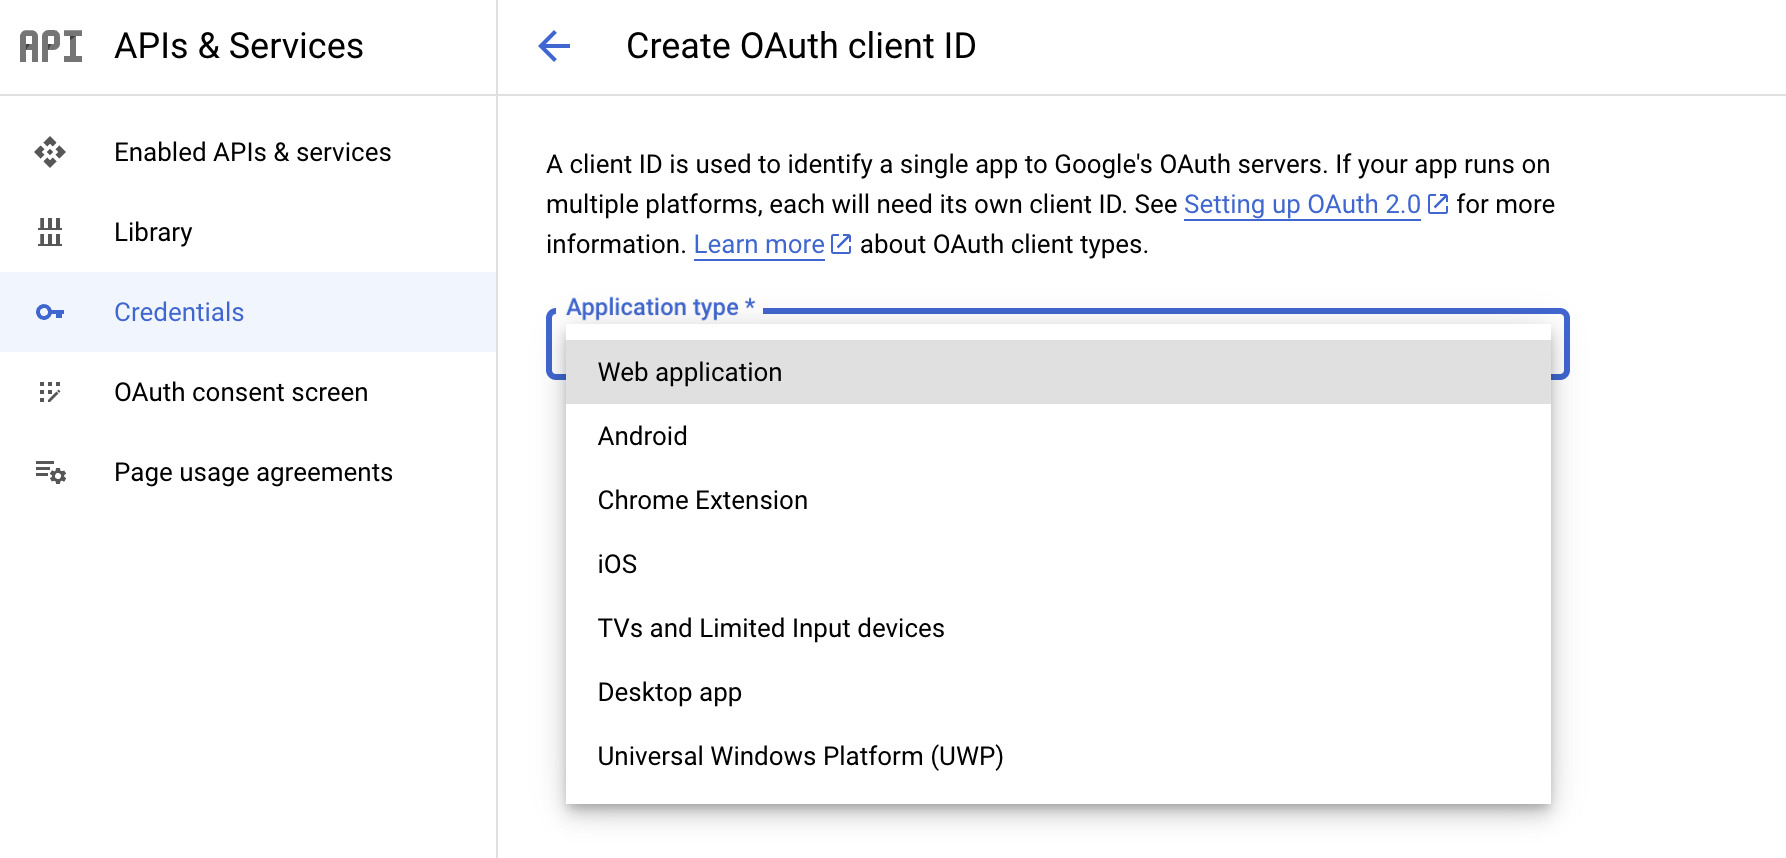
Select "Web application" as the application type.
-
-
Fill the required fields. In the Authorized JavaScript origins field, enter the origin for your app. You can enter multiple origins to allow for your app to run on different protocols, domains, or subdomains. In this case, you can enter
http://localhost:3000to be able to test locally andhttps://your-app-domain.comto be able to test in production.- In the Authorized redirect URIs field, enter the redirect URI for Google to be able to redirect back to your app after a successfull authorization. You can enter multiple redirect URIs to allow for your app to run on different protocols, domains, or subdomains.
-
Click Create. Then, your client ID and client secret will appear.
-
Copy the client ID and client secret and paste them in the
.env.localfile.


# Google OAuth
GOOGLE_CLIENT_ID=your-client-id
GOOGLE_CLIENT_SECRET=your-client-secret
Replace your-client-id and your-client-secret with the actual client ID and client secret you obtained from the Google Cloud Console.
-
Save the
.env.localfile and restart the app. -
Make sure to click
Publish Appin theOAuth consent screento make your app available to anyone to login with Google. if you don't do this, only users you added asTest Usersto your project will be able to authenticate with Google.
Now, you should be able to log in to your app using Google OAuth. When you click the "Log in with Google" button, you will be redirected to the Google login page, where you can log in with your Google account and authorize your app to access your Google information.